Hardwood Floor Services

Hardwood Floor Refinishing: How to Refinish a Hardwood Floor

Hardwood Floor Refinishing

If you have hardwood floors in your home, chances are you’ll need to refinish them at some point. Refinishing a hardwood floor can be a time-consuming process that involves multiple steps.

However, it’s a project that can be done independently and is less expensive than hiring Hardwood Floor Refinishing. Here are a few things you should know before starting your next refinishing project:

A professional hardwood floor refinishing job can run anywhere from $3 to $8 per square foot. This price range covers a number of factors, including the type and size of the area being refinished.

Hardwood refinishing costs also depend on the type and quality of wood used. Exotic woods can cost more because they can be difficult to sand and don’t react well with certain finishes. The wood’s texture and color may also impact the finished product.

Refinishing can be costly, so choosing a company that offers quality workmanship is important. Ask for a written contract that includes cleanup details, materials, a time frame, and the total cost.

Homeowners should also check to see whether cleanup is included in the refinishing cost. This is especially true if the floor is beneath other flooring like carpet or vinyl.

Often, contractors will charge extra for removing the old flooring before refinishing. This can add an additional $2 to $4 per square foot to the refinishing cost, so it’s a good idea to get a quote before you sign a contract.

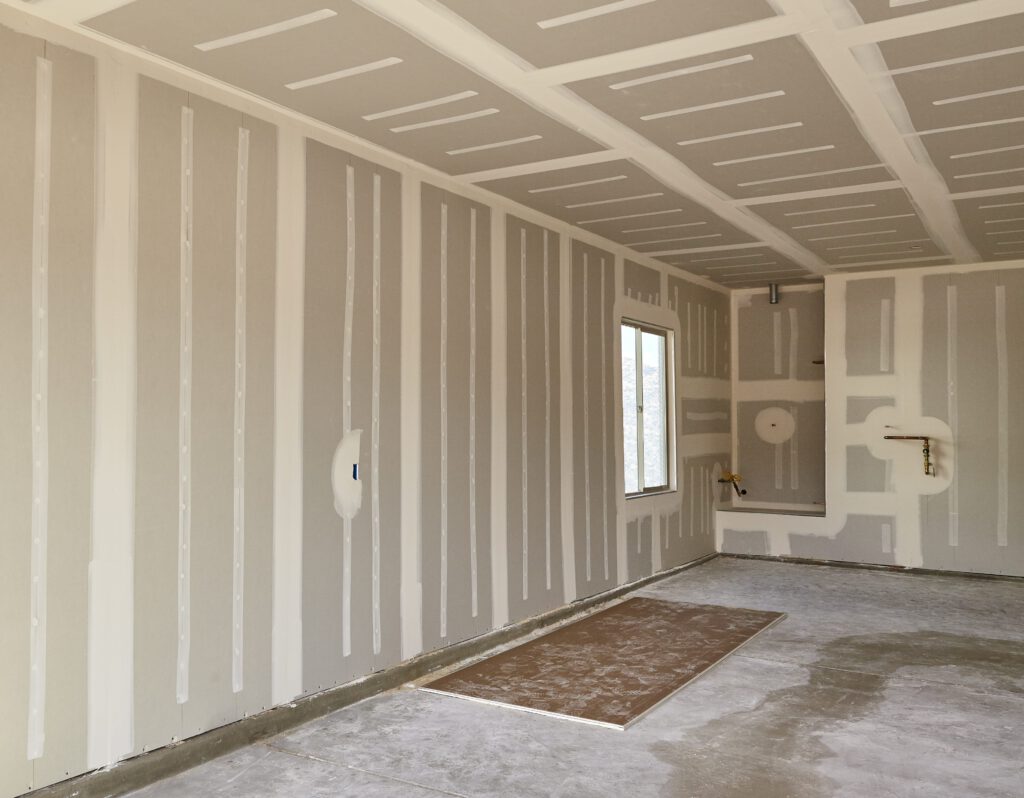
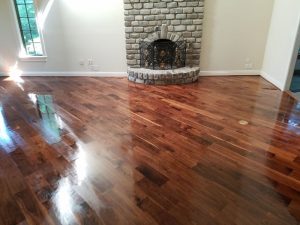
Hardwood floors are among the most coveted flooring types in homes, but they can be challenging to maintain. Taking care of them properly can not only give your floors a new look, but it can improve their value at resale as well.

While some homeowners opt to do it themselves, it’s a much better and more efficient idea to hire a professional. This way, they can be assured of the best results. It’s a great idea to find a local company that has experience with your particular style of wood flooring.

Refinishing hardwood floors involves sanding, staining, and sealing them to create a new look. It also removes surface imperfections, such as scratches and dents.

Before attempting any staining on hardwood floors, it’s important to make sure the wood is completely free of old paint, oils, waxes, and other materials that may prevent a good stain from sticking to the surface. In addition, it’s vital to check for moisture damage.

If the wood has been sanded and scratched, it’s best to give it a little bit of time to dry and harden before applying stain. It’s also a good idea to spot-test the stain before actually applying it to your floor.

The color of the stain can vary slightly between brands, so it’s important to make sure you buy a stain that is made specifically for the type of wood you have. This will ensure that the color matches the grain of the floor.

To determine whether your wood needs to be refinished, look for six key signs:

1. Rot

One of the most common problems with wood floors is rot. This can happen when the wood begins to expand and contract, causing it to crack or split. To prevent rot from occurring, it’s essential to keep your floors properly sealed.

2. Discoloration

The color of your wood is another factor that can affect how well a stain will work on it. If your wood’s color is darker than you’d like, it’s probably a good idea to refinish it.

3. Excessive wear and tear

If your floors are starting to show significant wear, it’s likely that they need a full refinishing. However, if they’re only slightly worn but still in good shape, you can try screening and recoating them to improve sealant adherence.

Home Improvement

How to Do Drywall Installation Right

Drywall

Drywall installation is an important part of a building, but it’s also one of the most complicated things to do. Luckily, there are plenty of resources out there to help you learn how to do it right. 

A drywall installation can be a complex process. It involves many different aspects, from deciding on the types of drywall and finishes to hiring a contractor. These factors can have an impact on the cost of drywall installation.

The size of the room can affect the overall cost of the project. Larger rooms will require more labor and materials. If the drywall installation is in a high-ceilinged area, it may require scaffolding.

You can also reduce the cost of your drywall installation by doing it yourself. This can save you hundreds of dollars. Alternatively, you can hire a professional to do the work for you. But before you do this, make sure to do your research.

One of the most time-consuming parts of drywall installation is the preparation. During this stage, the drywall is smoothed. A joint compound is also applied to the surface to cover the joints. There is a 24-hour drying period before sanding.

Finally, painting is the finishing element of drywall installation. The cost of a drywall finish can range from $0.50 to $1.00 per square foot.

For a typical 12 x 12 room, you will need about 18 panels. The price of a sheet of drywall can range from $10 to $20.

When it comes to drywall installation, the thickness of the sheet can have an effect on the cost. Thinner drywall is cheaper than thicker drywall. Also, if the drywall is fire-rated, it will cost more.

Some companies charge a flat fee per square foot. Others take into consideration the size of your job. Regardless, the total cost of a drywall installation will depend on the number of sheets of drywall, the type of drywall, and the complexity of the work.

In addition to deciding on the type of drywall and finishes, you can get a better idea of how much drywall installation costs by getting a quote. Having an accurate idea of what the average cost of a drywall installation is will help you decide which contractors to hire.

If you are unsure about whether or not a drywall installation is right for you, you can ask your drywall installer about the most effective ways to do the work. Depending on the results, you might be able to install the drywall yourself and save money. Alternatively, you can hire a drywall expert.

If you’re planning to do a home improvement project, you’ll want to make sure that you’re installing drywall that is the right size. Having the right amount of drywall will make the installation process go much smoother.

Depending on the type of drywall you’re using, there are different sizes to choose from. The thickness of the drywall is another important factor to consider. This will determine the size of the screws you’ll need to use. For example, if you’re installing drywall over metal studs, you’ll probably need a screw with a larger diameter.

Choosing the right drywall size for your project will also help you minimize the number of joints you have to create. The thicker the drywall, the fewer joints you’ll need to create. Also, the thinner the drywall, the less work you’ll have to do to pull it into position.

When installing drywall, you can use a power drill with a drill bit that matches the size of your screws. This will allow you to drive the screws into the studs without stripping the threads. You can also use a cordless drill with adjustable speeds to avoid ripping the drywall off of the studs.

When choosing the screws, you’ll need to decide whether to use coarse or fine threads. Coarse-thread drywall screws are typically used for attaching drywall to wood studs. However, you can use fine-thread drywall screws in some applications. Fine-thread drywall screws create a tighter grip on metal.

Once you’ve determined the appropriate drywall size for your project, you can begin your installation. Be sure to attach drywall to the joists in the framed area with drywall glue or adhesive. The drywall will need to be wiped off once it’s installed to remove any excess adhesive.

Next, it’s time to set up your anchors. Using your stud finder, you should locate the studs in your drywall. In many cases, you’ll need to predrill your drywall screws to prevent the drywall from splitting.

After your drywall is installed, you’ll need to do a walkthrough to ensure that the walls are plumb and that any lights are in the correct places. A walkthrough will also ensure that no patches or rips are missed.

Home Improvement

Personal Loans For Home Improvement

Home Improvement

When you’re in the market to improve your home, there are a number of options to consider. You can upgrade your kitchen, add an apartment to your home, or even convert your basement into a one-bedroom dwelling.

When it comes to home improvement, the bathroom and kitchen are on the front lines. Considering the fact that many households operate on a tight budget, it’s no surprise that these spaces are where it’s at. Fortunately, a well-planned and executed renovation can pay dividends. Despite the challenges, there are plenty of pros who can help you get the job done. Contact Lawrenceville Home Improvement for professional expertise.

The newest trend in bathrooms is to replace whirlpool tubs with walk-in showers. While the upgrade is not cheap, it is the most cost-effective way to get the most out of your budget. Among other benefits, you’ll be able to enjoy more room for relaxing and recharging your batteries.

As you plan out your next big upgrade, make sure you keep an eye on the local real estate market. You might be surprised at what’s available on the market. With a little planning and forethought, you can find a good fit for you and your family. If you’re not ready to commit to a remodel, consider purchasing a fixer-upper to renovate yourself.

Although the best bathroom and kitchen upgrades will cost a fair bit of money, it’s worth the effort to make the most of your space. For instance, a kitchen with outdoor access is a plus for a lot of families. Likewise, a more open floor plan can allow for more light and better ventilation, which can reduce utility costs in the long run. Whether you’re looking for a full-fledged kitchen overhaul or just a few spruced-up cabinetry, there are a handful of professionals who can help you. Make sure to check out their websites for more information. They are all listed in the House & Home Directory. Hopefully, these tips will save you time and money. Lastly, keep in mind the old adage: “Always leave your home in good shape.” Regardless of how often you change out your locks or do the laundry, it’s a good idea to have a plan in place.

Converting your basement into a one-bedroom apartment can add housing to your neighborhood and provide a new source of rental income. Basement apartments are a critical supplement to the housing stock, offering financial stability to underserved families. But it can be a complicated process.

One of the first steps is obtaining a building permit. Then you need to meet certain requirements to get a certificate of occupancy. There are several legal factors that will influence the cost of converting your basement into an apartment. Some of these include insulation, ventilation, wiring, and the number of bathrooms and bedrooms.

You may also want to consider converting your basement into an in-law suite. An in-law unit will be very spacious. This can be accomplished through a retaining wall, excavation, and a foundation amendment.

You will need to decide on the number of bedrooms, bathrooms, and closet space you need for your basement apartment. The best way to determine this is to take a look at local apartment listings. Once you have this information, you can start figuring out a layout. A layout should include a living room, kitchen, and dining area. It should also have a separate exterior entrance.

To make your basement apartment more livable, you will need to consider lighting and sound-buffering materials. In addition, you should consider adding windows and enlarging a walk-out door. If possible, install an outdoor sitting area.

A basement is also a great place for a nanny or au pair. However, you will need to ensure that your home meets all the code requirements for a basement. Also, you will need to work with a contractor to do the drywall installation, electrical, and plumbing. They can provide technical assistance and a no-interest loan if you are in need of additional funds.

Another option is to rent out your unfinished basement. However, this may not be the best idea for all homeowners. Not only does this require the proper permits, but it can be very costly to do so.

Flooring

How to Refinish Your Hardwood Flooring

Hardwood Flooring

Wood flooring is a product that is manufactured from timber. There are a number of different species and styles of flooring available for you to choose from. There are also many different cuts and colors available for you to consider.

Refinishing Hardwood Flooring is a good way to bring your floors back to their original beauty. Refinishing can be a DIY project, or you can hire a professional to do it for you. Refinishing isn’t a cheap project, and it can take some patience.

Refinishing your floor is a fairly messy job, so it is important to do it correctly. Before you begin, you should clean the floor and seal it. You may also need to strip the old finish. If you are unsure about any part of the process, it is a good idea to consult a professional.

Choosing the correct type of finish is crucial. A good finish can help to protect your wood. There are a variety of different finishes, from stain to varnish. Using the right type will ensure that your floors stay beautiful for many years.

Refinishing your hardwood flooring can be a difficult task. You have to remove the old finish, make sure that you have plenty of room, and use the right tools. You should consider using a specialized sanding machine. The best sanding machines are smaller and have plenty of dust extraction.

If you decide to do it yourself, you will need a large drum sander and some safety gear. Before you begin, you need to decide whether you want to use a water-based or oil-based finish. The water-based type has a shorter drying time and a lower VOC content. However, the water-based type is not as durable as the oil-based one.

You can buy a variety of wood floor stains, from water-based to oil-based. Which one you choose will depend on your budget and your personal preferences. A stain can cost up to $3 per square foot.

There are some simple steps you can take to keep your hardwood flooring looking beautiful. These steps can be added to your weekly routine and will make your floors last for years.

Getting rid of dust is a good start. Regular cleaning is also important. You can use a vacuum or soft bristle brush to sweep your floors. These sweeping techniques can prevent dust from grinding into your hardwood floors.

Another way to protect your wood floors is to use felt floor protectors. You can also place a rug near the entry doors to keep dirt from tracking on your hardwood floors.

A humidifier can be useful in the winter to prevent the excessive shrinking of the wood. A large rug can help reduce damage from wet shoes.

Some people recommend adding a sealer to the finish to help lock in the color. You can also use UV blockers to protect your floor from the sun’s harmful rays.

When purchasing a new wood floor, ask for a warranty that covers maintenance. This will ensure that the hardwood is properly protected for the length of the warranty period.

For the best results, it’s recommended that you choose a brand that has a good warranty. You can find a number of manufacturers that offer this service. Aside from protecting your investment, it can also help you avoid costly re-flooring projects.

Some of the most common causes of damage to hardwood floors are water, sunlight, and dust. These issues should be addressed immediately to prevent further damage. Keeping your floors clean and dry is the easiest way to prolong their life.

Other things you can do include having a large area rug and using a doormat. You can also avoid water spills by wiping them up promptly.

Hardwood flooring is an expensive project. The cost is affected by a variety of factors. This includes the type of wood, labor costs, and how much it will take to install it.

If you want to avoid the hassle of refinishing your floors, opt for engineered wood instead. These products offer an attractive appearance, but they’re also more durable than solid wood. They’re also available in a wide range of colors.

Another option is tile. These products are more durable and warp-resistant than wood, but they’re still a more costly option. You can expect to pay between $2 and $10 per square foot for a ceramic or porcelain tile floor.

General

Unsure If You Can Change? Use These Tips To Help

Personal development may be difficult, but you have every reason to start the process today. Personal development can propel your career, relationships and other areas of your life to new heights. You will also feel more confident about yourself and know for certain you are doing the right thing. This article will outline several quick, yet highly beneficial ways that you can start your personal development journey today.

Generalizations are the enemy of your self-improvement and success. Examine your thought processes to see what negative, general beliefs you hold about yourself. If you say in your mind that you “always fail,” etc., this is not accurate. Even if it was only one time, you have succeeded in the past! Remind yourself that the future is bright and self-improvement is possible.

Take responsibility for your own life. If you aren’t where you want to be in life, it is easy to blame others. You may feel that your parents let you down, your teachers weren’t good enough, your boss had it in for you or that you didn’t have as many advantages as someone else. The truth is, your choices and actions have gotten you to the point where you are today. The only way to make changes is to stop blaming others, and take responsibility for your thoughts, actions and accomplishments. Only then will you be fully in control of your own life.

Don’t just fill your mind with facts. It’s one thing to learn the steps to a process, and entirely another to feel them as they become integrated into your being. An idea must sit in your mind and undergo digestion and analytical thought before you can benefit fully from the information you have taken in.

As you can see, personal development actually encompasses a multitude of things. If you have fine attention to detail, you can use this to better target your personal development efforts. No matter what you do, though, this process cannot be rushed through. Take your time and enjoy this period of growth!

Calif Painter, Calcolater Mini, Together New Mexico, Fina Anjou, Central Delaware Advocacy, Edpro-Webblog, Optimized Prime, Millwood Estates, Principia Lifelong Learning, Scrum Turkey, Cherish Collages, Business Best Practice, STL Rent Strike, Topologx, Metal–Roofing, Gillies Pie Board Of Realtors, Calsto Wing And Recovery, High-Search-Engine-Position, Texoma Business Pages, Winchester Animal Welfare, Fanou Flage, Raise Up Cleveland, Payne Creative Services, Preservation Law Digest, Solar Farm Tour, Calligraphy Byangi, Kitchen Solvers-Roswell, Travertine-Floors-Travertine-Flooring, UC In The Valley, Blueridge Mtn Hideaways, Fish Tales Up, Mitzvah Project Book, Rogue Class, Uson Tile, Yaga Net 1, Addressing WV, Thunderbird BMTS, Homes For Cheapinaz, Work At Home Right Now, Palmetto Pear Tree.  

Flooring

Tips For Epoxy Flooring Maintenance

Using a power scrubber or hand broom with a soft bristle brush attachment is easy to remove loose dirt and debris from an epoxy floor. Avoid using aggressive nylon pads or stiff bristles as these can scratch the surface and dull the finish. You can also clean your epoxy floor with a clean shop mop and occasionally use cleaning products. Make sure to use clean water and mops. Do not use citrus-based cleaners or other corrosive chemicals, as these can damage the finish. Hiring Epoxy Flooring Denver professionals can efficiently address your flooring maintenance needs.

flooring

During the winter months, you should use welcome mats on your epoxy floors to catch dirt and other materials that might otherwise get on the surface of your floor. These mats will also help prevent gravel and ice from being tracked into the floor. It is important to clean your epoxy floors regularly to avoid damaging your investment. Here are some tips that will help you maintain your new floor for many years to come. Let’s take a look!
Vacuuming daily is the best way to clean your epoxy floor. A pH-neutral floor cleaner is a great choice for cleaning the surface, but a stronger solution may be necessary. You can use a nylon brush to clean the surface, but make sure to use it carefully. Don’t scrub too hard or forcefully; this can damage the coating. If you use too much force, your floor will lose its gloss.
It is essential to avoid heavy traffic on your epoxy flooring. Even though it can withstand wear and tear, heavy use can still cause damage. You should place a cardboard box or computer mouse pad under bicycles, and plywood under rolling jacks to act as a shock absorber. You should also ensure that you sweep away any debris that may be on the floor. When using a vapor barrier, it is important to protect your floors from excessive moisture.
While you should never leave your epoxy flooring unclean, it should be cleaned regularly. It is a good idea to buy an anti-static product for your floor to avoid the risk of permanent damage. If you’re concerned about staining, invest in a Golf Cart Parking Mat to protect your flooring. You can purchase an anti-scratch mat for your electric golf carts. While it is not a necessity to have a special parking space for your car, it is a good idea to consider a garage mat or cover for your vehicle.
During winter, your epoxy floors should be cleaned regularly with a pH-neutral floor cleaner. If you’d prefer a stronger cleaning solution, use a nylon scrubbing brush. You don’t want to apply too much pressure on your floor because it may cause damage its appearance. In addition to this, you should avoid the use of steel wool as this is abrasive and will harm the surface.
The best way to keep your epoxy floor clean and shiny is to regularly use a hard foam mop. Use a clear ammonia-water mixture to clean and disinfect the floor. If you don’t have a hard foam mop, you should use a sponge. Alternatively, you can use a vacuum cleaner to clean your floor. This is the most efficient and convenient way to maintain your epoxy flooring. It will also make your floors easier to maintain.
While it may not seem like much, a daily sweep and mop will help you keep your epoxy floors looking as good as new. The surface of an epoxy floor is very porous, so make sure to clean it thoroughly with a mild soap and water mix. If you don’t have a strong soap, you should use a non-acidic solution that doesn’t contain any harsh chemicals. This is the most effective way to maintain your epoxy floor.
The best way to maintain your epoxy floor is to use a chemical cleaner. Citrus and vinegar will remove the shine of your floor. A chemical cleaner is more effective. It can remove any traces of these substances, and will ensure your epoxy floor stays as good as new for a long time. You should also consider the cost of maintenance, because it is relatively low compared to the alternatives. This type of floor can last up to five years with minimal care.

Coding Bootcamp

The Benefits of a Coding Bootcamp

Coding Bootcamp

A Coding Bootcamp is a short program that teaches students a specific programming language or framework. The curriculum typically lasts between six and eight weeks and includes theoretical and practical lessons. Upon graduation, students will have a portfolio, online presence, and interview skills to make them attractive to future employers. According to CIRR, 79% of graduates are employed in programming jobs. There are now over 85 campuses in the US, and many of them have gone online due to the COVID-19 pandemic. By 2020, the industry will graduate over 25,000 students and generate $350MM in tuition revenue.

While coding boot camps offer hands-on training in programming languages, many students choose to focus on web or mobile development. The main benefit of choosing one language over another is that it will open up a whole new world of job opportunities for you. Additionally, you’ll be able to find a job within three months of graduating. This way, you’ll be more likely to land a good job and can get paid more as well. Visit this website at https://www.scamrisk.com/the-millionaire-shortcut/ for more information about a coding Bootcamp.

The number of job opportunities is growing rapidly. Many coding bootcamp graduates become technical co-founders, teaching assistants, and support staff. Others find jobs as technical product managers. They also get paid more and can take on new projects at their current companies. A few students even make their way to the top and have a higher salary than when they enrolled in a traditional college. This means that a Coding Bootcamp is a great option for those looking for a high-paying career in a fast-growing industry.

It’s possible to get a good education without enrolling in a Coding Bootcamp. Despite the lack of credentials, a Coding Bootcamp is a great option for those who want to pursue a career in computer science. You can use online resources to get the skills you need. But there are disadvantages to this method, too. Unlike traditional schooling, the cost of attending a Coding Bootcamp can be quite expensive.

In addition to increasing your salary, a Coding Bootcamp can also help you learn new skills. Aside from being a great career option, many companies also interview their candidates for their lack of programming skills. A successful candidate will be able to communicate with others, develop strong problem-solving abilities, and solve challenges in their own time. It will be a good way to make money in a new field or hobby.

While a Coding Bootcamp isn’t a degree-granting institution, a Coding Bootcamp can be a great bargain for students. A four-year degree can cost anywhere from $20,000 to $43,000, but a Bootcamp costs only a fraction of this. This makes it an excellent investment for those looking to make a career in the tech industry. A good career in technology can make your dream a reality.

The demand for skilled software developers continues to grow. Despite the high cost of hiring software developers, the skill is highly in-demand. Moreover, companies are paying top dollar for a qualified software developer. As such, a Coding Bootcamp is an excellent investment. It can be the difference between a job with a good salary and a successful career. There are many benefits to coding bootcamps, and a Coding Bootcamp can be the perfect solution for your career.

A Coding Bootcamp is an excellent investment for those who want to learn coding. It will help you land a great job after graduation. Some students become technical co-founders or work as teachers, teaching assistants, or support staff. In some cases, they can even find a job as technical product managers. Other bootcamps may be in a different city. Regardless of your location, you can choose a credible coding bootcamp.

The advantages of a Coding Bootcamp are numerous. For starters, they are often associated with universities. They will provide relevant hands-on training and help graduates find jobs after graduating. You should also ask about job placement rates and average salaries after completing the program. Some bootcamps publish their statistics, which are extremely helpful for potential employers and prospective students. Some are affiliated with universities, while others are independent. They should also be associated with a university.

Uncategorized

Choosing Your Residential Flooring Installation

Most people will overlook the installation of residential flooring in their homes and focus on the aesthetics. There is no doubt that flooring can make a home look more elegant and spacious. However, there are some aspects of flooring installation that are not to be overlooked. These are areas that require attention regardless of the style or design of the flooring you have chosen. With these simple and easy steps, you will increase the longevity and beauty of your floors.

flooring

The installation process not only guarantees your floors perform properly for their lifetime but also provides you the peace of mind knowing you will never experience a scratched, damaged or voided warranty. These all factor into the peace of mind you rightfully deserve when choosing a flooring material for your home. When you select a certain material for the floor, certain measurements will always be taken to make sure the perfect fit.

Many consumers overlook the installation of wooden floors in their home due to the fact they believe installation of other materials will provide the same high-quality results. The fact is different materials hold differing levels of quality and in many cases inferior products are used. For this reason alone, do not disregard the installation of any flooring in your home. A major consideration for a residential flooring installation is the use of high-quality hardware. Regardless of what kind of flooring you choose, never compromise on the high-quality of the hardware that will be installed.

The right flooring can greatly improve the overall appearance of your home. If you want to ensure you get the absolute best results, take the time to find a showroom that shows off all available residential flooring services in your area. These showrooms will have floorings from all kinds of different sources so you can compare the different finishes and colors. This will not only allow you to choose the highest quality products, but you can also compare prices and see for yourself which showroom will offer the best deals.

If you are interested in saving some money on the Residential Flooring installation process, you can always take on the installation process yourself. Although it is a great idea to hire a professional, it is not necessary. In order to complete the entire installation process yourself, you should have access to all the tools needed and a bit of basic do-it-yourself know-how. By following the steps outlined below, you should have no problem completing the installation of your new floors.

Whether you choose to purchase or build your own hardwood floors, installing them yourself will save you a significant amount of money. The cost of labor will often be less than if you were to hire professionals to complete the task for you. For example, wood floors installation companies charge approximately forty dollars per square foot for installation. However, if you decide to build your own hardwood floors, you can often install the same floor for much less money by using an easy to follow floor plan.

When choosing your hardwood flooring installation professional, you need to make sure you find one that has experience with your type of floor. Many professional installation companies will offer a free consultation. During this consultation, they will be able to determine if the floor is suited to your home and lifestyle. They should also be able to give you examples of past residential flooring installation projects to provide you with an idea of their skills. By choosing a professional flooring installation business that has performed work on similar projects, you can ensure that the finished product will look beautiful and last for many years to come.

Finding a professional flooring installation business is much easier than it was in the past. Today, there are thousands of these businesses nationwide. Because of this, many more companies are now able to compete for your business. If you do not have experience with installing residential flooring yourself, hiring a professional to do the job for you is the best way to go. You can save time and money by working with someone who knows what they are doing.

Uncategorized

How To Determine The Right Aquarium Lighting System For Your Needs

Aquarium lighting refers to any artificial lighting which is utilized to illuminate an aquarium tank. There are two types of aquarium lighting; those provided by electricity and those which are self-correcting. In the case of self-correcting aquarium lighting, the aquarium fluorescent bulb is used. This kind of aquarium lighting does not consume any electricity but merely alters the color of the aquarium water through chemical reactions.

aquarium lighting

Aquarium lighting with the use of aquarium lighting tubes is a popular method in which to provide artificial light to aquarium tanks. These tubes are enclosed and contain several light-emitting diodes (LED’s) at various distances. The depth of these LED lights can be adjusted to vary the amount of light the fish will obtain during daytime or to give them the kind of light they prefer at night. The length of the aquarium lighting tubes can be up to sixty feet.

Most aquarium lighting systems also include additional equipment which enables the operator to change the kelvin (or temperature) of the fluorescent lamp that is powering the unit. The kelvin is the term given to the degree of warmth that the fish are adapted to, ranging from ten percent to forty percent. If the kelvin rating of the fluorescent bulb is greater than twenty percent, it will generate its light energy at a blue-green color temperature. On the other hand, if the kelvin rating is lower than ten percent, the light will become red. Aquarium fish tend to adapt to the environment in which they live so the higher the kelvin temperature, the more intense the colors of the fish will be.

The two types of aquarium lighting that use fluorescent tubes are most often used for the tank only. In this case, the aquarium lighting system has been built so that it will provide the proper intensity and color temperature necessary for marine life to flourish. A second type of system uses natural sunlight to provide the intensity needed. This is also popular in homes with smaller aquatic plants and animals. It is important to note that natural sunlight will not always provide the intensity necessary.

When you are ready to purchase aquarium lighting for your tank, you will need to take into account both the size and the shape of the tank as well as the level of light your new additions will need. You should keep in mind that fish will require different levels of light in order to function properly. Larger fish will generally require more light while marine corals will grow better if their light is more low intensity. There are fluorescent lights designed specifically for fish as well as those designed for marine or plant life.

Most hobbyists are familiar with fluorescent aquarium lighting. Most people have at least one aquarium featuring one of these tubes. Fluorescent lighting is the most common and inexpensive way to provide aquarium lighting. Because it is so cheap to purchase, it is often purchased by hobbyists to use in conjunction with their other aquarium lighting.

The majority of hobbyists begin their aquarium lighting systems by using tubes. These can be purchased in pre-assembled or unfilled sizes. You can find these in a variety of colors and intensity levels as well as shapes. However, it is recommended that you purchase a set of tubes that you can use for both general and special purposes. This will allow you to change out tanks as new additions or simply to adjust the intensity of the overall lighting system.

The use of fluorescent tubes has increased tremendously due to the advent of LED lighting. The biggest advantage of using these bulbs over traditional ones is the fact that they do not burn out as quickly as incandescent lamps do. In addition to this, they give off nearly no heat which makes them great for use in aquarium lighting systems. Once you have taken these factors into consideration, it is time to determine which aquarium lighting system works best for you and your tank. As always, consult an expert when deciding which aquarium lighting supplies to use.

Flooring Installers

Hardwood Floor Installation Techniques

hardwood flooring

Hardwood floor installation is one of the most complex tasks for a do-it-yourselfer. The tasks involved can be extensive, involving measurements, cutting, polishing, and more. In addition, installation requires the careful use of tools such as a sander, angle grinder, and sandpaper. Once installed, many of the steps repeat themselves, making installation even more difficult. Here’s a look at how to install Hardwood Flooring Fairfax VA, as well as a few tips for the installation process.

First, learn about per square foot pricing for hardwood floors, including various rates for each plank. This information can usually be found on the manufacturer’s website or by calling the manufacturer directly. The per square foot price should be used in the context of the installation area size to determine the cost-per-planks. Also, be aware that different woods have different installation requirements, so it’s essential to consider this when assessing per square foot pricing.

Identify the three main hardwood flooring grain styles. They’re oak, pine, and heart pine. Each wood type has unique characteristics that affect installation. For example, oak is a durable wood that doesn’t need to be stained, while heart pine is a lighter-colored wood that does need to be stained.

Look at picture examples to decide on the style of hardwood flooring to install. There are solid, engineered, laminated, or plank options that look like wood in appearance. Engineered options tend to look like real wood, while laminated options look like wood with a laminate coating.

Many flooring stores offer prefinished or sanded selections. Prefinished floors can be purchased without having to do any installation at all, although installation may be necessary if the floor will require a subfloor to be installed. Sanded floors can be refinished with a finish if desired.

Consider your installation budget before selecting solid hardwood flooring. Solid floors can be much more expensive than engineering or laminated floorings. Also, solid hardwood flooring can be more difficult to install. Engineered flooring kits are available that include the necessary tools for installation, including a staple gun. Also, laminates can be applied over solid hardwood floors using an adhesive. Both engineered and solid hardwood flooring can be stained to meet your decorating needs.

When choosing hardwood flooring, you must also consider your entry way. If your room has a second floor, you will need to install the first floor boards first. After the first rows of boards have been installed, you will need to create a groove for the second row of boards. This can be accomplished by placing a board between the first and second rows of boards. You must leave at least half inches from the front of the board to the back of the board to create the groove. Once the second row of boards is installed, you will need to secure the boards into place with nylon hinges.

For an elegant, smooth look, try hardwood floor installation that includes nailing the nails and not using glue. Nails can be bought at home improvement stores as well as some major hardware stores. Professional hardwood floor installation experts should be used only when installing solid hardwood, especially when doing multiple boards at a time.

Nails can be purchased in two-by-eights, three-by-fours, and five-by-fours. All nails used for solid wood floors should be galvanized. Galvanized nails are made using long strands of metal instead of nails. This allows the nails to last longer. When installing the nails, make sure they are set on every board in the pattern. When the nails are not positioned in the correct pattern, the entire floorboards could be ruined.

Another hardwood floor installation technique involves using a tongue and groove method. The process involves installing the first two rows of boards face together. The nails will be placed through the tongue and groove in the first row. The nails are driven nails that are one-third as wide as the board’s width. On the second row, the first row is installed face down. The second row’s tongue and groove are installed just like the first row.

A hardwood floor installation can be very tricky. With proper tools, materials, and product instructions, an installation can be completed easily. To minimize the number of mistakes, it is important to follow all the product instructions and guidelines.

If you have an existing old flooring with beams and joists already installed, you need to first remove all old boards and then remove the beams and joist. You need to measure your floor space so that you can calculate how many boards you will need to install on the newly measured area. Then you need to measure the tongue and grove locations for the new boards so that you are able to install the boards according to the manufacturer’s instructions. Finally, you need to screw the tongue and groove to the beams and joists with the help of the appropriate screws.